
How to Create Events in GA4 via User Interface
Paul Jarvis · Feb 1, 2023One of the most relevant things about the new generation of Google Analytics GA4 is the fact that its data model is event-based.
This means that every single hit or interaction is considered an “event,” which, in theory, provides users with more tracking flexibility to understand what’s happening on websites in real time.
On top of that, you can create new events within the tool’s interface. If you don’t know where to get started, we’ll show you how to create events in GA4.
3 Things to Know Before Creating Custom Events in Google Analytics 4
Naturally, Google Analytics collects pre-existing events as soon as you implement Google Tag Manager snippets to your website.
These events are dynamic, which means that you can create a new event, modify event parameters, add new custom parameters, and even reorder created events if you please.
When your website visitors trigger events, you can use this data to learn more about the way they interact with your web page, which is quite useful. But, before you set up new events, there are three things that you must know.
1. There Are Two Ways to Create Custom Events in GA4
Creating new events from the custom events screen in GA4 can be done through two different methods:
- Using Google Tag Manager, which is a manual process that you complete through the Tags Tab. In this case, you need to create your own Event Tags and Triggers for the events to show on your reports. Learn more about Event Tags here;
- Or by using the Analytics Admin Panel, via the User Interface.
Both methods work great to handle specific conversion events and recommended events. But using the User Interface to do so is way simpler.
For practical purposes, this guide focuses on creating custom events via the User Interface of GA4.
At the end of the day, creating events will simplify the comprehension of data streams and historical data across the GA4 interface.
2. Custom Events Limitations in GA4
When it comes to limitations, events have some things that you can and cannot do once you set them up. Among the most relevant limitations to events, we have the following:
- You can create up to 50 events based on existing events;
- Modified events will always appear in the order they have on the Events Modifications list;
- Both modified events and created events do not apply to current historical data;
- Modified events will always be processed before created events are processed;
- It is not possible to change the order of created events;
- It is possible for one or more hours to pass before event modifying or creation displays on GA4;
- When creating events through GTM, you cannot use existing parameters from the items array.
3. Custom Event Naming Rules in GA4
There are naming rules for events that all users must follow. Event names are one of the most important parameters in GA4, so it is important to consider the following:
- You can use both English and non-English words for the event name;
- Event names will always be case-sensitive;
- All events must start with a letter - you cannot start event names with numbers;
- You can use underscores for event names, but using spaces is forbidden;
- Lastly, there are pre-existing event names, parameters and prefixes that you cannot use so they do not interfere with the original event that already exists within GA4.
How to Create Events in GA4 via User Interface
It is necessary to understand each event parameter related to your custom event so you can properly experience enhanced measurement when it comes to collecting data through GA4.
This means that, in order to create events in GA4, you must modify the parameter data of the new event accordingly. Worry not - doing so via User Interface is quite simple, so keep on reading to learn how to do it.
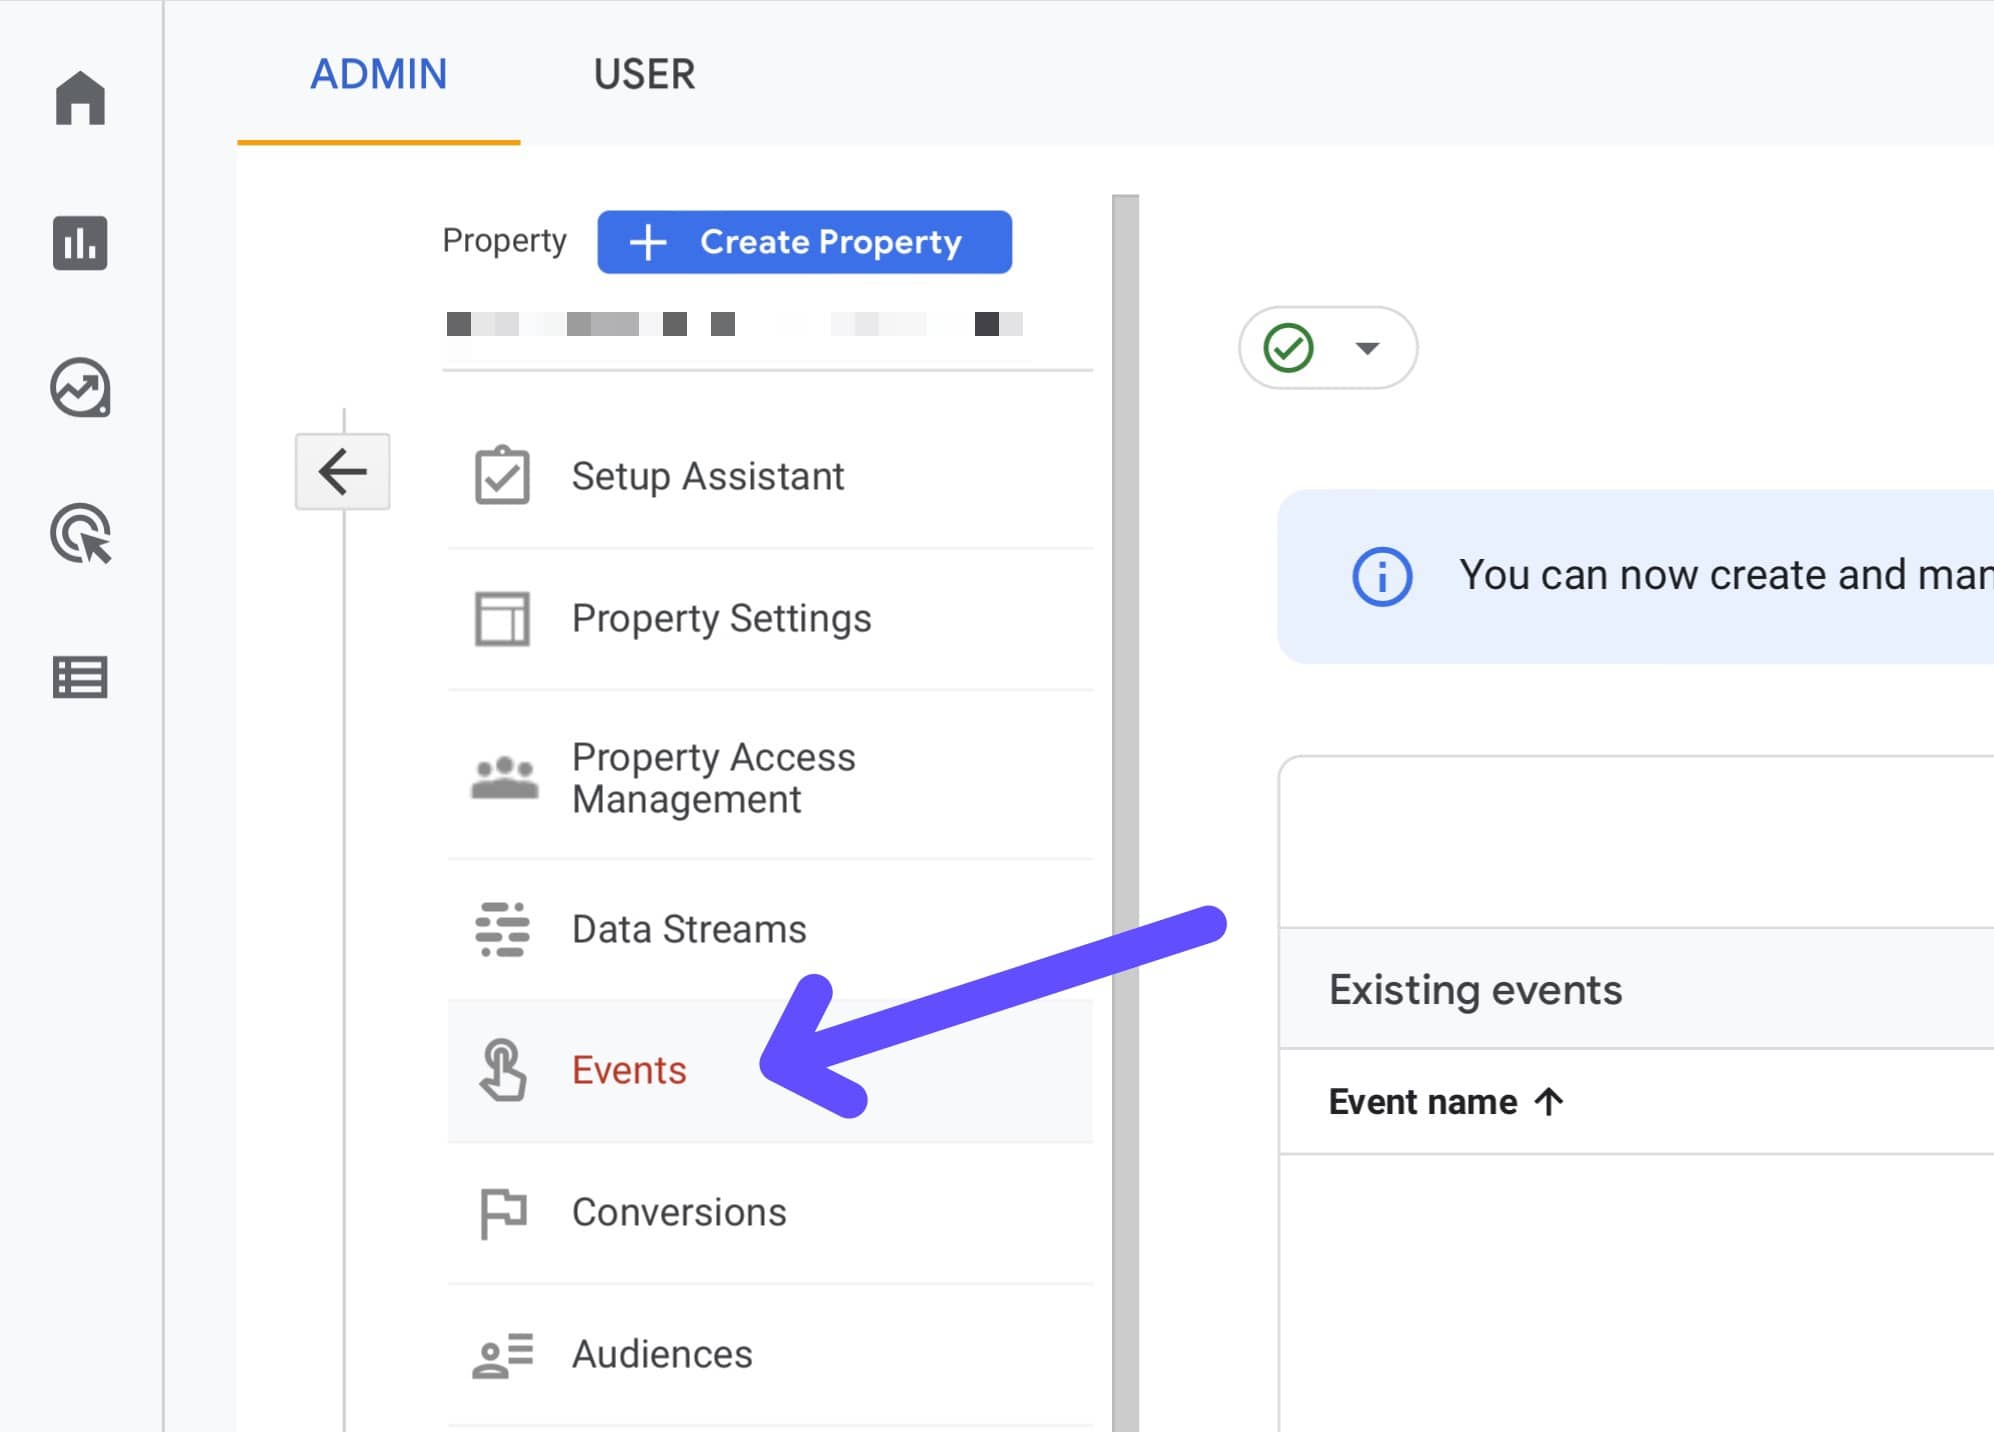
Step 1: Open GA4, Click Configure, and Go to “Events”
First of all, open Google Analytics 4 through your admin profile. Then, look for the Configure option right at the bottom row of the left-side panel, and click on Events.
You will be taken directly to the Custom Events screen, where all existing events will show up.
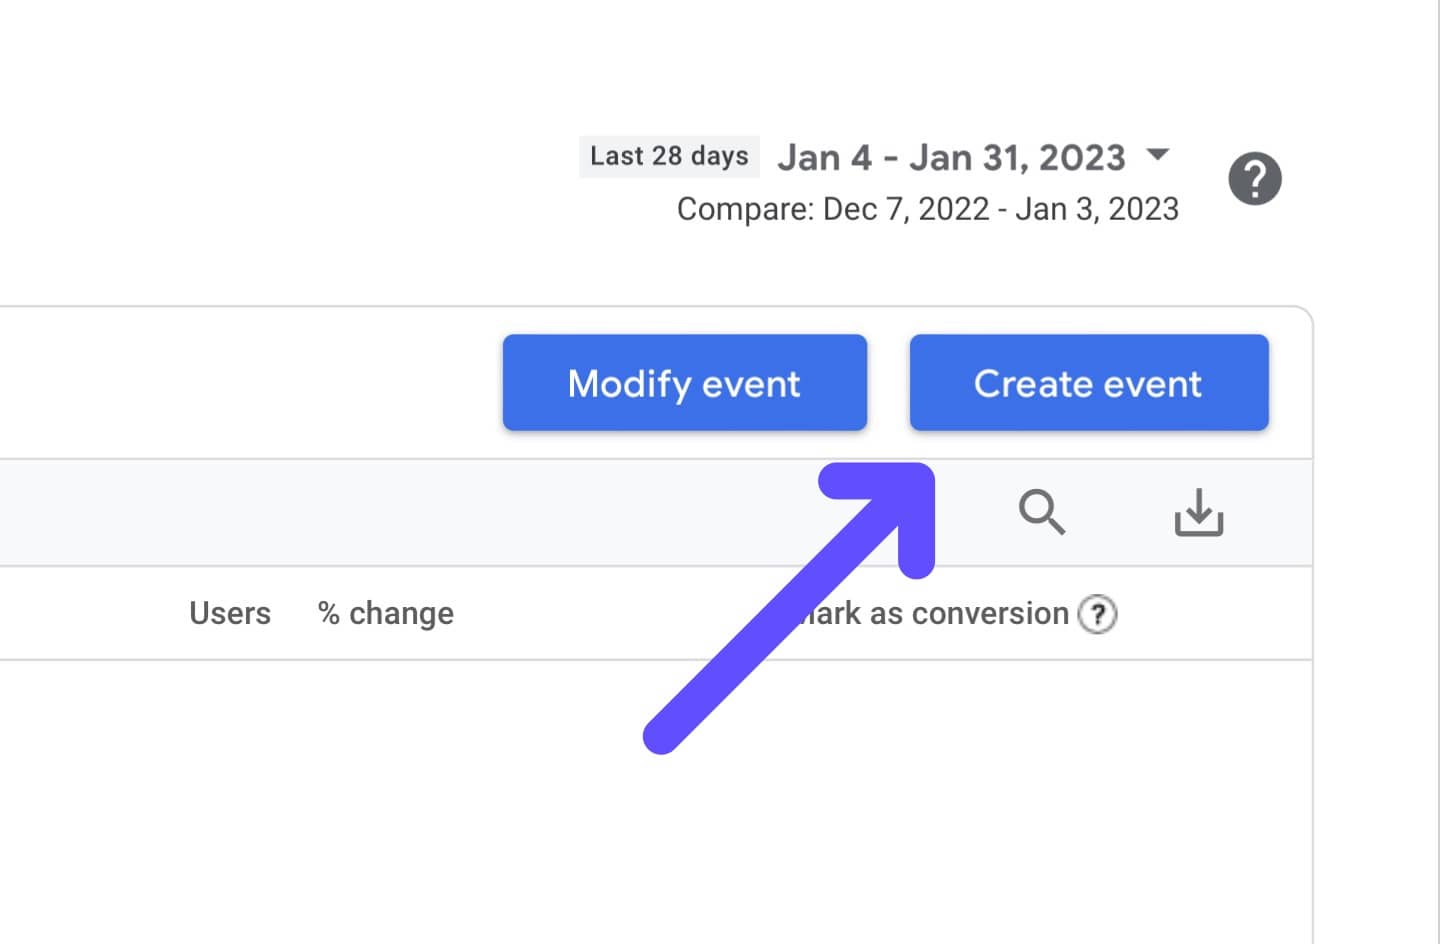
Step 2: Select “Create Event”
Now, look for the blue button at the top right corner of the Events Table that says Create Event.
Click “Create Event,” and move on to the following step.
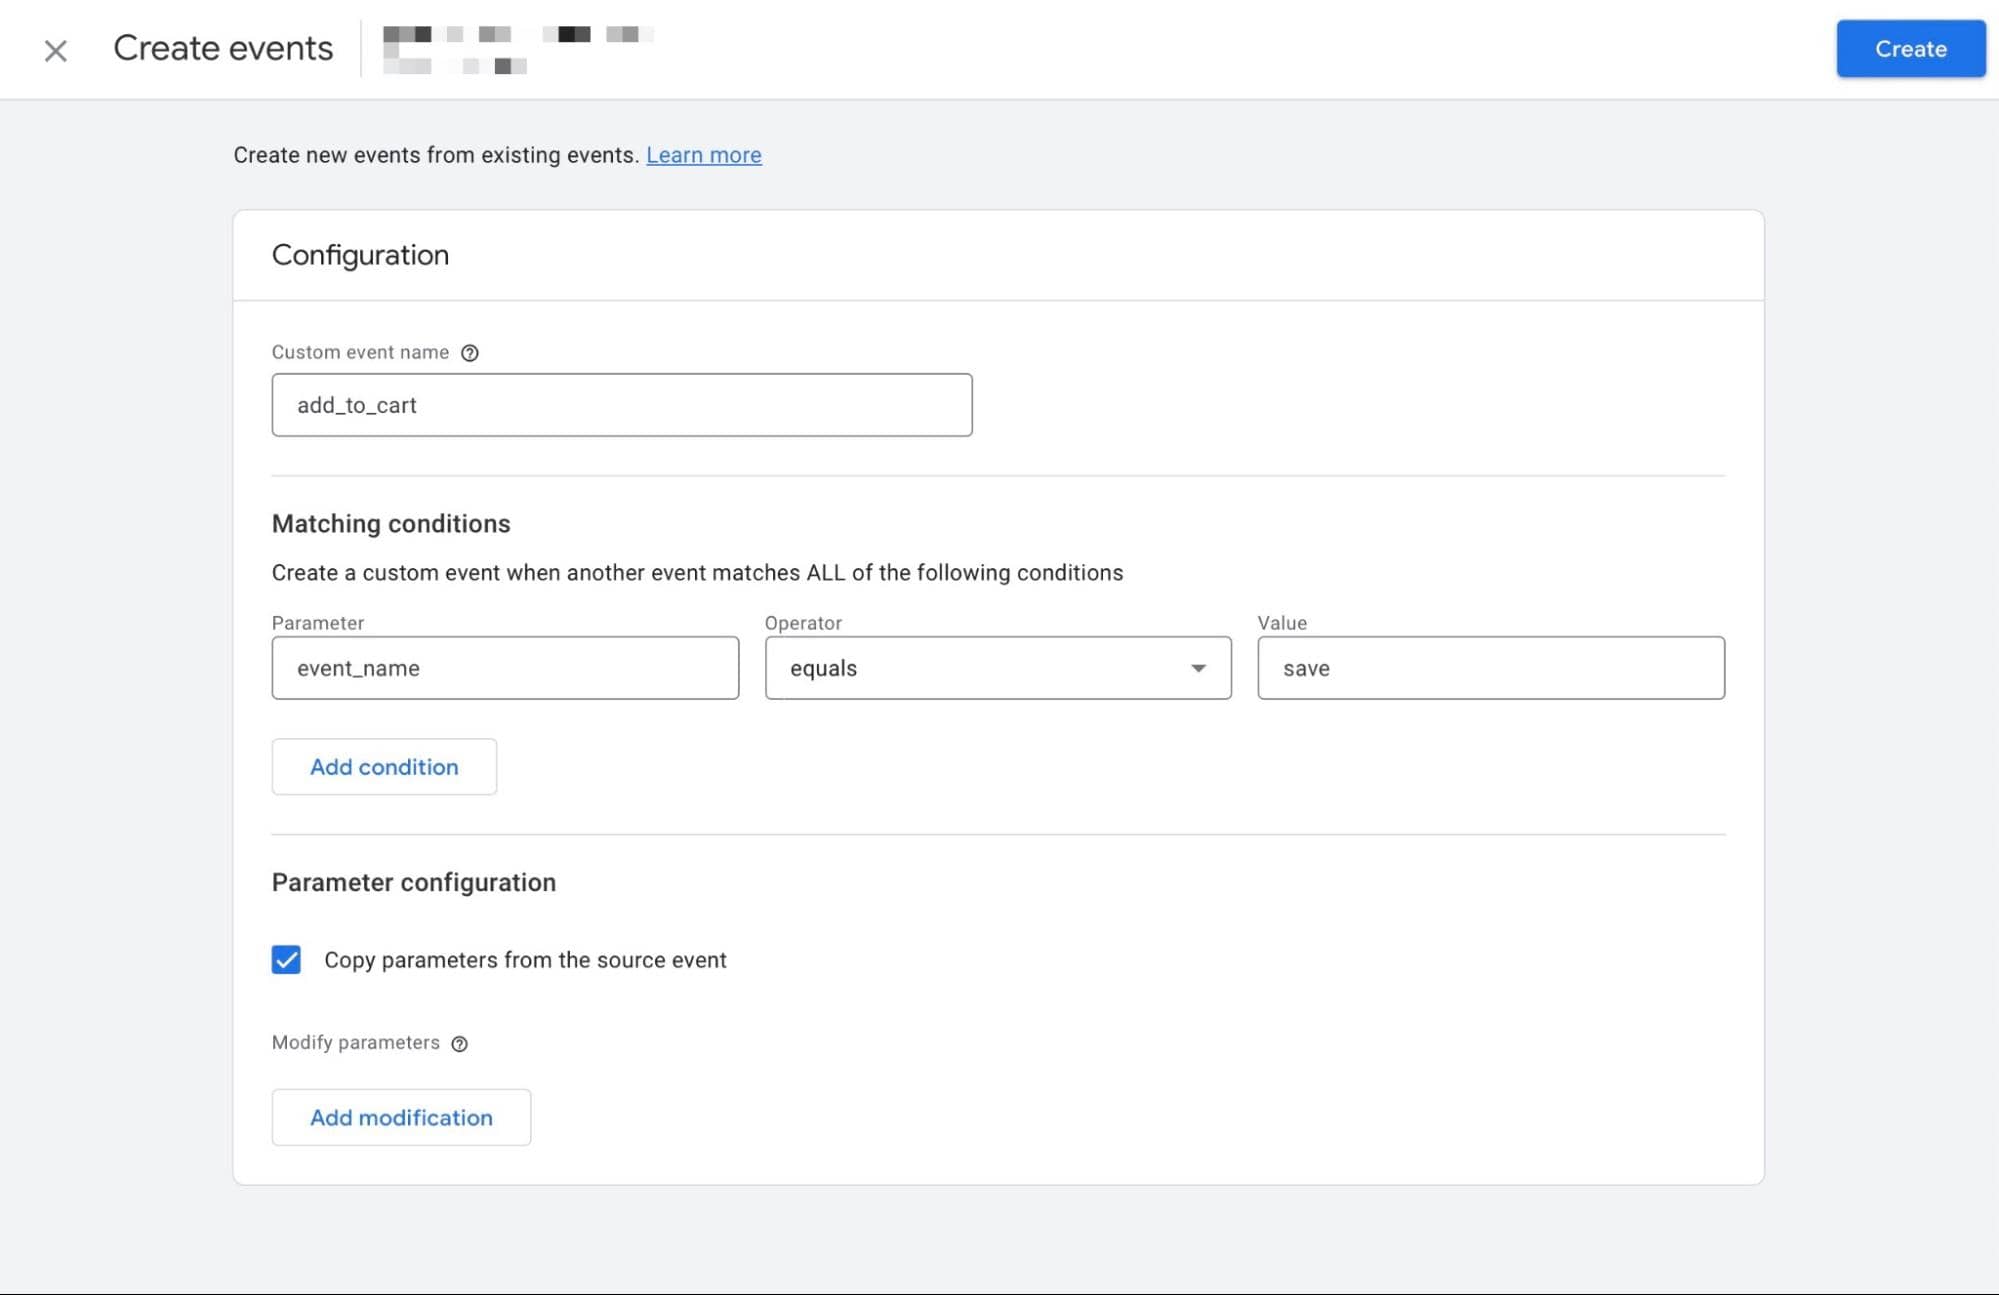
Step 3: Enter Event Name and Conditions
Here is where the magic happens - you need to modify each event parameter for it to work as it should.
You will see three conditions and parameters that will determine the way that your event works:
- Custom Event Name: under this section, you must name your event based on the “hit” that will record. Then again, use only letters, underscores and numbers;
- Matching Conditions: matching conditions specify the actions that will trigger the event as soon as they take place. You can learn how to specify matching conditions efficiently by going to the official GA4 website;
- Parameter Configuration: parameter configuration can be based either on existing events, or you can create your own parameters inside GA4. If you simply want to use the parameters from the original event, simply select “Copy Parameters from Source Event.”
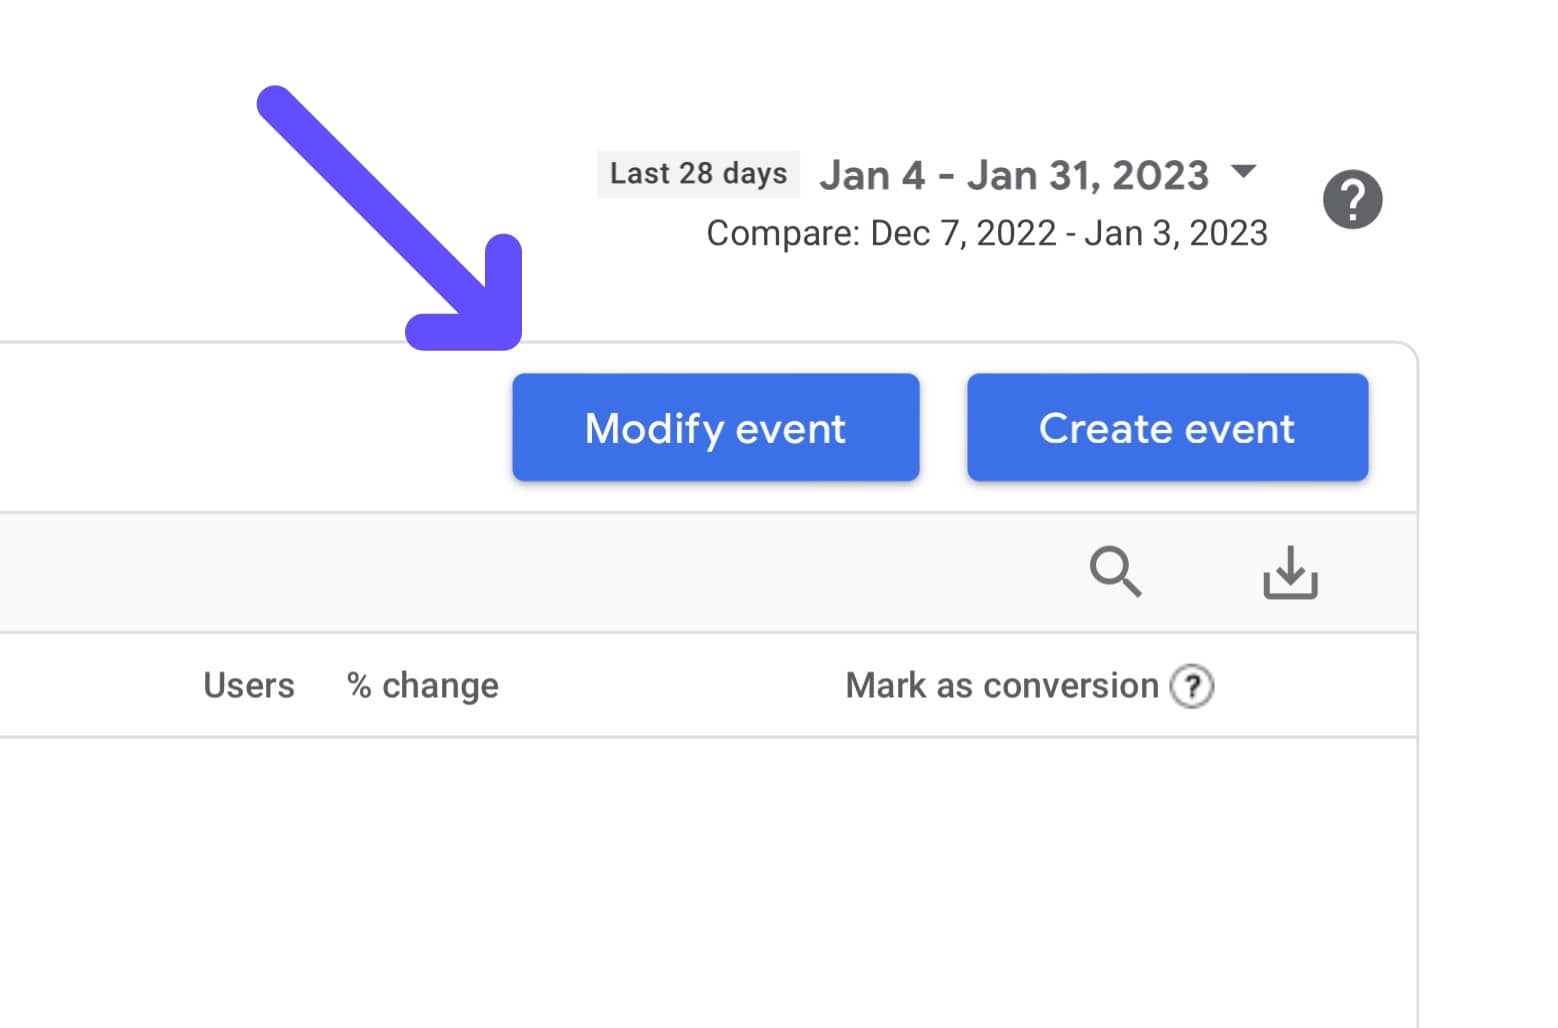
Step 4: Save the Event and Test It On Realtime Report
Lastly, when you are done creating your event, simply click on “Create”, and it will go to the Events Table.
To see if your new event is firing as it should, you have two options: either check your Realtime Reports or wait for website visitors to trigger the Event, which normally takes about one day or less.
Our recommendation is to simply go to your website, trigger the matching conditions of the event, and go to your Realtime Report. The updated Events Table will show under Event Count by Event Name, and thus, you will know if the event is working.
Pro Tip: You can also mark an event as Conversion by going to the Events Report and selecting the Conversion option. If you do this, whenever the event triggers, it will also appear on the Conversion Screen. Do this only if it makes sense with the overall goal of the event.
How to Modify Events in GA4 via User Interface
Modifying an existing event is possible, and doing so is easier than creating new events. Google has an Event Modifying YouTube tutorial where they teach you how to do this, and we can summarise it in three simple steps:
- Go to the Events screen and click on Modify Events;
- Select the Event that you will modify, and then click Create;
- Change the values of the event based on your new needs (event name, matching conditions, and parameters), and click Save.
Wrapping Up: Creating New Events in GA4 via User Interface
Using GA4’s User Interface to create a new event is fairly straightforward as long as you follow the aforementioned steps - otherwise, the interface can get really confusing.
Keep in mind all limitations, event naming rules, and parameters before you decide to modify or create a new event inside GA4.
Heads up: Fathom Analytics also allows you to create new events in an easier, more straight-to-the-point and more efficient way. Privacy is our main concern, and Fathom Analytic’s events protect both your and your user’s privacy at all times.
FAQs
Why Are My Events Not Showing Up on Google Analytics 4?
Usually, new events do not show up in Google Analytics due to three main reasons:
- The event code was wrongly set up via Google Tag Manager;
- There are GA4 or Realtime Report filters being applied on your GA view, which block you from viewing the events;
- Website visitors are using tracker-blocking extensions.
How Are Events Tracked in Google Analytics 4?
Events work through a simple code added to certain items within your website. If you add this snippet of code to, let’s say, a button, set up the event, and then someone happens to click the button, you will receive in-detail reports about this process in real-time. You can learn more about how Google Analytics events work here.

BIO
Paul Jarvis, author + designer