
How to Track Button Clicks in Google Analytics 4
Paul Jarvis · Feb 8, 2023One of the main characteristics of the new Google Analytics 4 data model is that the tool works based on events.
Back in Universal Analytics, the data model was based on hits or sessions - that has now entirely changed, which is one of the biggest updates in GA4 compared to UA.
This means that, now, if you want to perform Google Analytics Button Click Tracking, it is important to do so through certain event parameters on your web page or app.
This guide shows you how to track button clicks in GA4 in a fast, simple, and efficient way.
Heads up: Registering button clicks with Fathom Analytics is simpler via our Event Creation Features. Simply set up event names, and values, and you will be seeing events in your Fathom Analytics dashboard in no time.
How Does Button Tracking in Google Analytics 4 Work?
Button tracking in GA4 works through event tracking, just like all the parameters measured by Google’s new Analytics tool.
Creating events in GA4 is fairly easy, and you can use them to have a better understanding of how website visitors interact with your site.
This is one of the main differences between GA4 vs Universal Analytics, and, to be fair, although setting event tracking parameters on buttons can be a little bit complicated for newcomers, we’ll make things simple for you.
Events can be used to track outbound link clicks, file downloads, general user clicks, scrolling through pages, interactions with a particular page, and more.
By tracking your button clicks through a Google Analytics event, you are able to understand how many users are clicking on that button, which will help you to optimize your funnel and user journey flow.
What Do You Need for Button Tracking in GA4?
In order to create buttons in GA4, you need two main things:
- Your Google Analytics tag must be enabled on your website or app, meaning that the transition from UA to GA4 should already be completed.
- Have a properly set up Google Tag Manager account on your property.
Using Google Tag Manager to track button clicks is the easiest way to do so because creating a tracking code for it works without problems.
Although you could also use GTM with Universal Analytics, the truth is that managing GA4 events is more efficient and easier.
Besides these basic requirements, remember that the button should already exist on your website. You can learn more about GA4 and GTM, by going to the official Google website.
How to Track Button Clicks in Google Analytics 4
In this blog post, we are going to simplify the process of tracking button clicks in Google Analytics 4 as much as we can.
Have the Google Chrome Web Browser open and ready (preferably), and let’s do everything we need so you can start tracking clicks on buttons on your Google Analytics account.
Step 1: Turn on Enhanced Measurement
When you set up GA4 for the first time, the tool recommends you turn on Enhanced Measurement.
Since Google Analytics 4 works through events, Enhanced Measurement will simply implement automatic and recommended event tracking into your website, which will simplify things for you a lot.
This way, you will not need to set up basic events that are automatically integrated into GA4’s default event category.
You can also manually turn on Enhanced Measurement via the Data Stream section of your Google Analytics 4 Admin Panel.

Step 2: Set Up Your Google Tag Manager Account
Now, you need to install Google Tag Manager by setting up a new account.
In order to install GTM, go to the GTM Website, and create an account. Follow the on-screen instructions, until you get to the following screen:
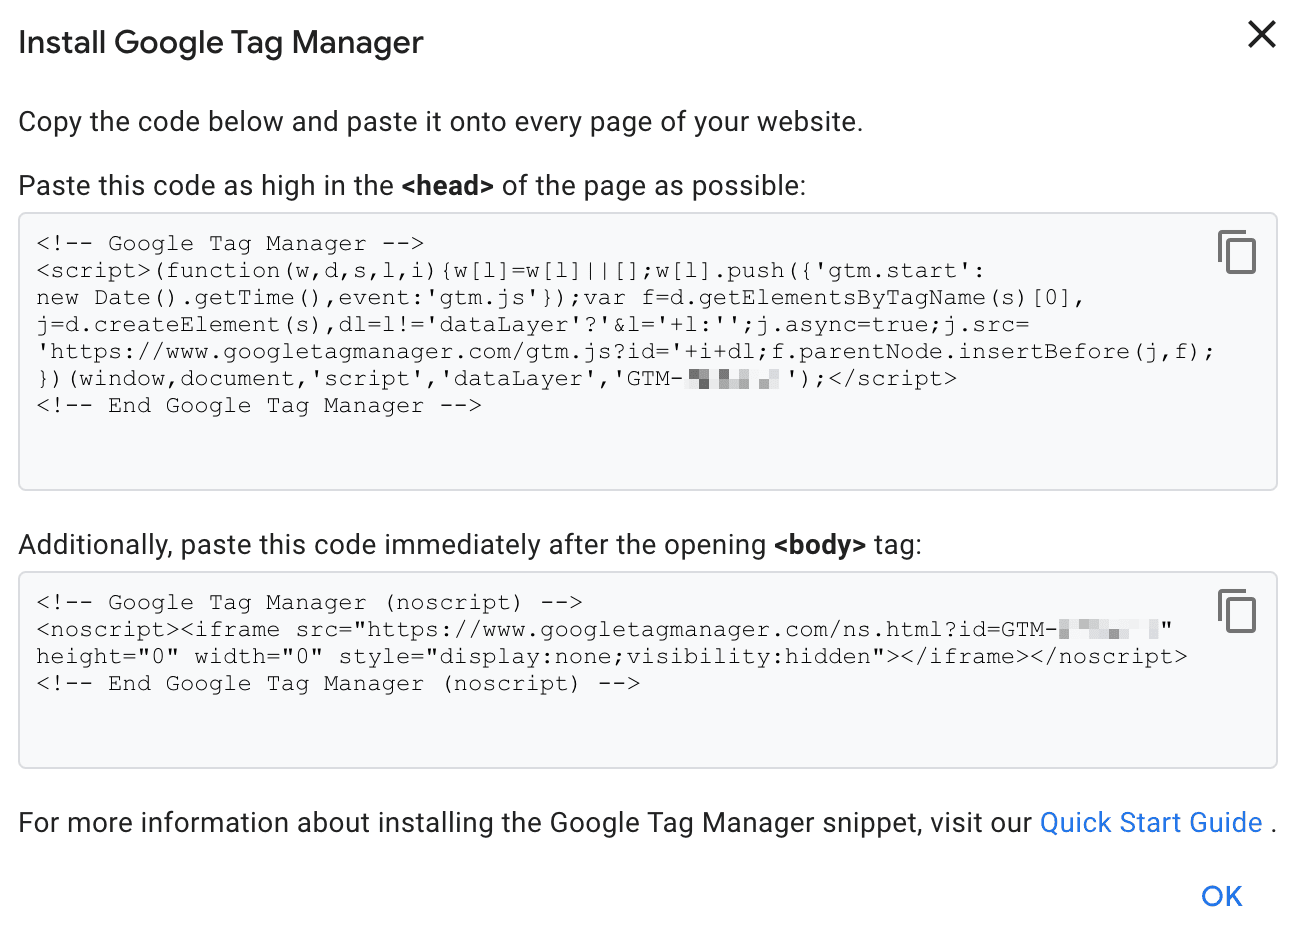
You need to copy and paste your GTM code into the and sections of your website pages.
Doing so will enable all Google Tag Manager features and built-in variables on your page, which you will certainly need for button click tracking.
Step 3: Configure Google Tag Manager Built-In Variables
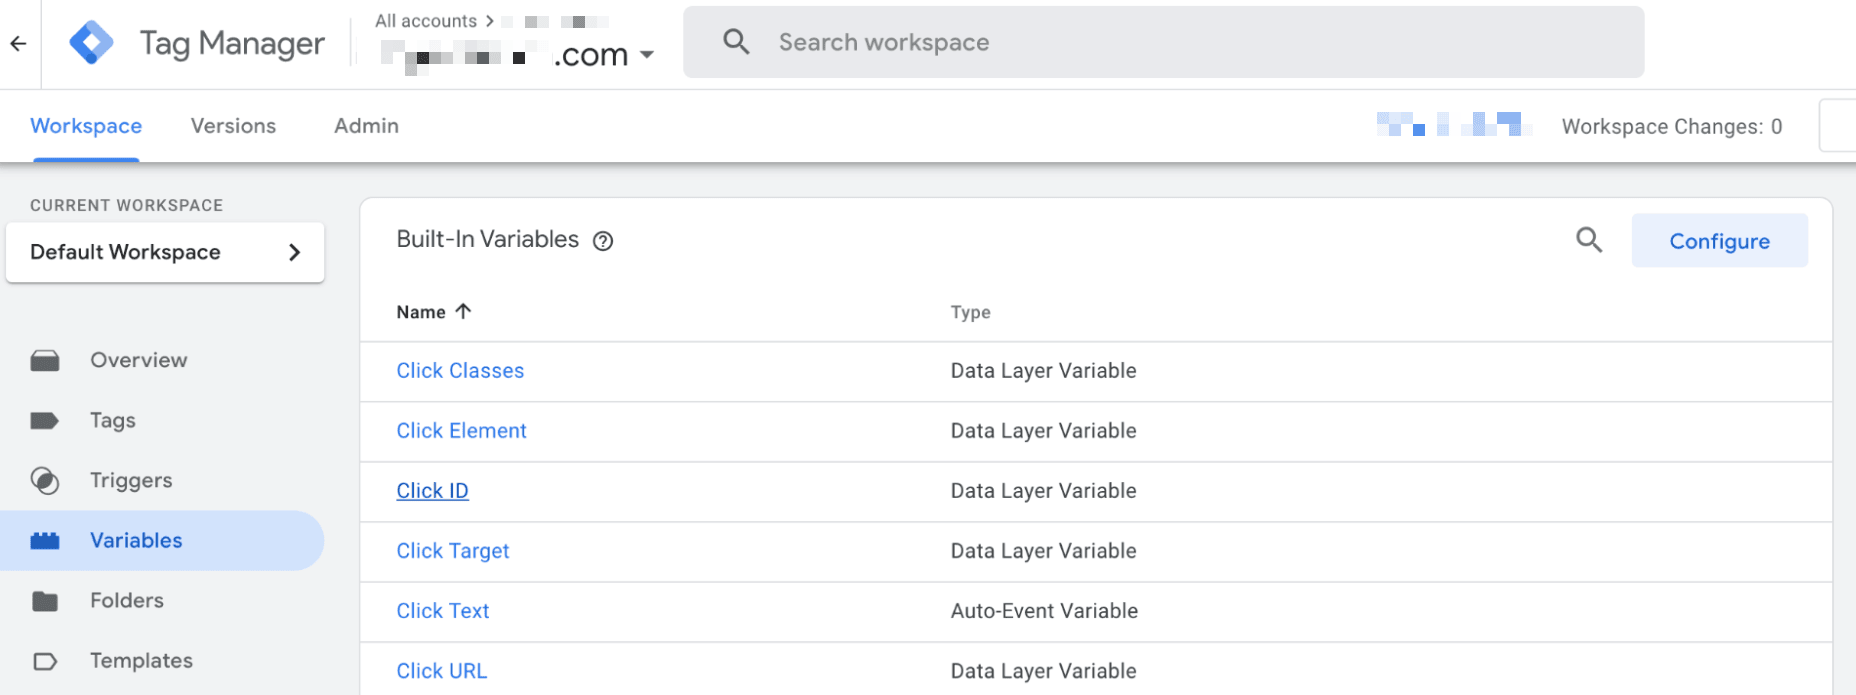
After successfully installing GTM on your site, go to the main Google Tag Manager Workspace, and in the left menu, look for the Variables option.
You will see a button that says “Configure” at the top right corner of the screen - click on it.
After clicking on the Configure button, scroll down until you find all Click Classes and enable them all.
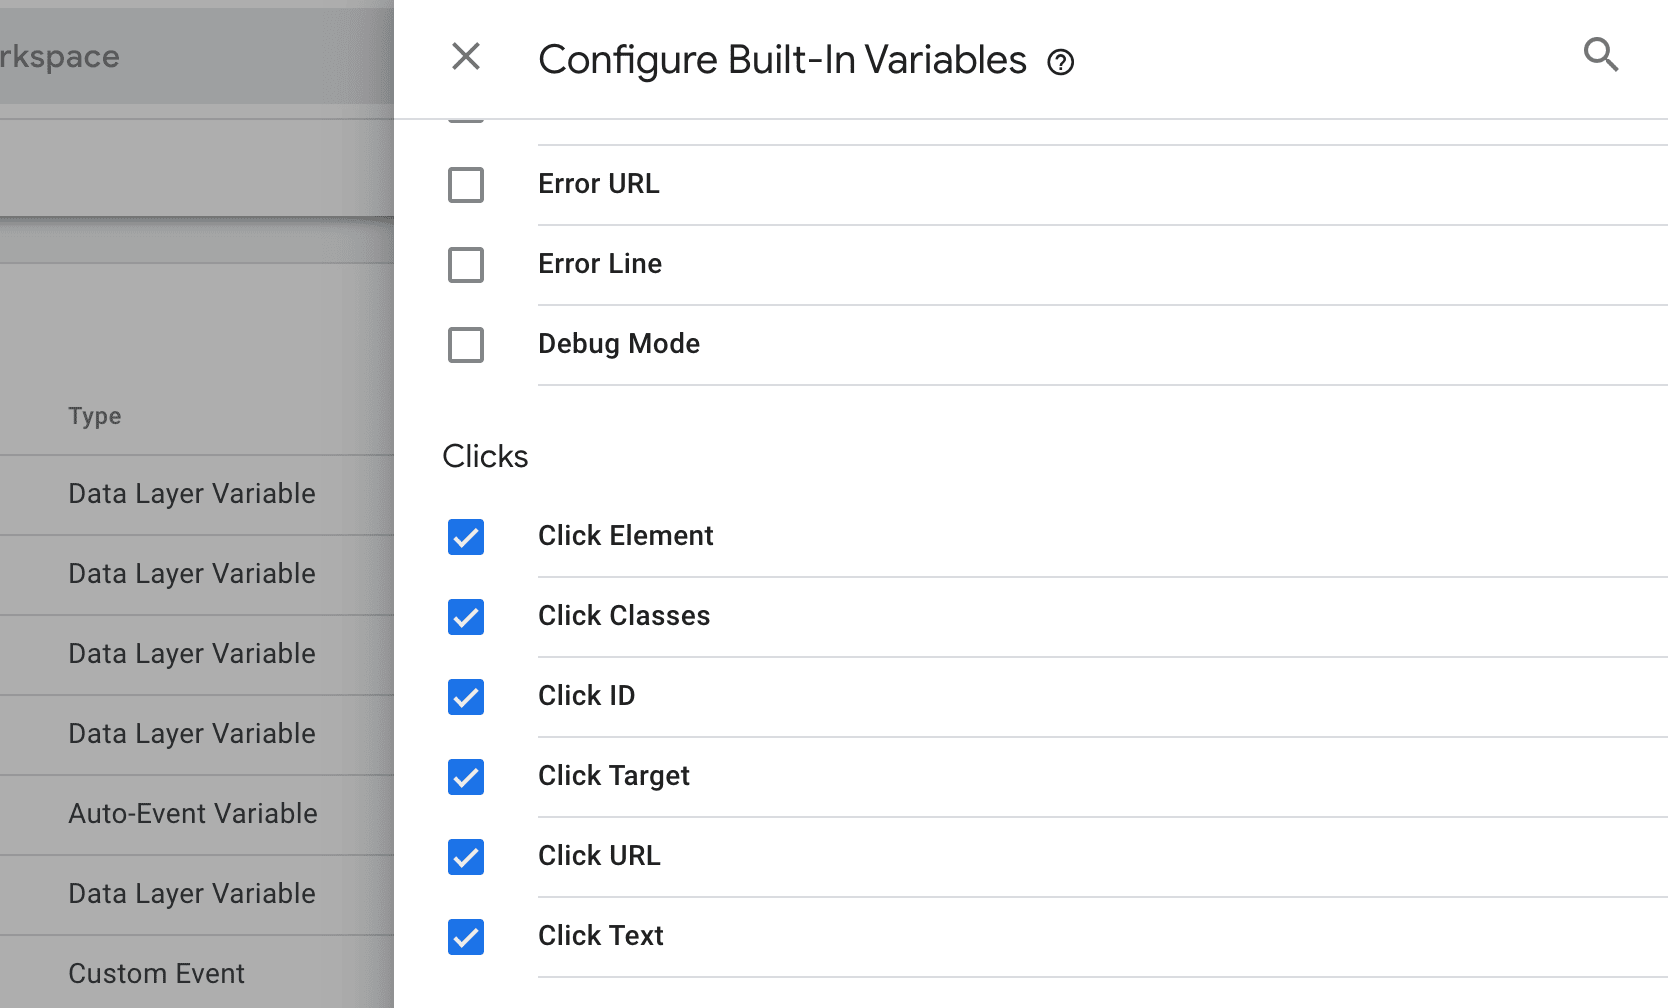
Then, once you select all the click types, click “Save” and go back to the Variables tag.
Here, click on the Submit button that appears at the further right corner of the screen.

Follow on-screen instructions, and wait for all the changes to be reflected on your GTM account. The following green message should appear on your end:
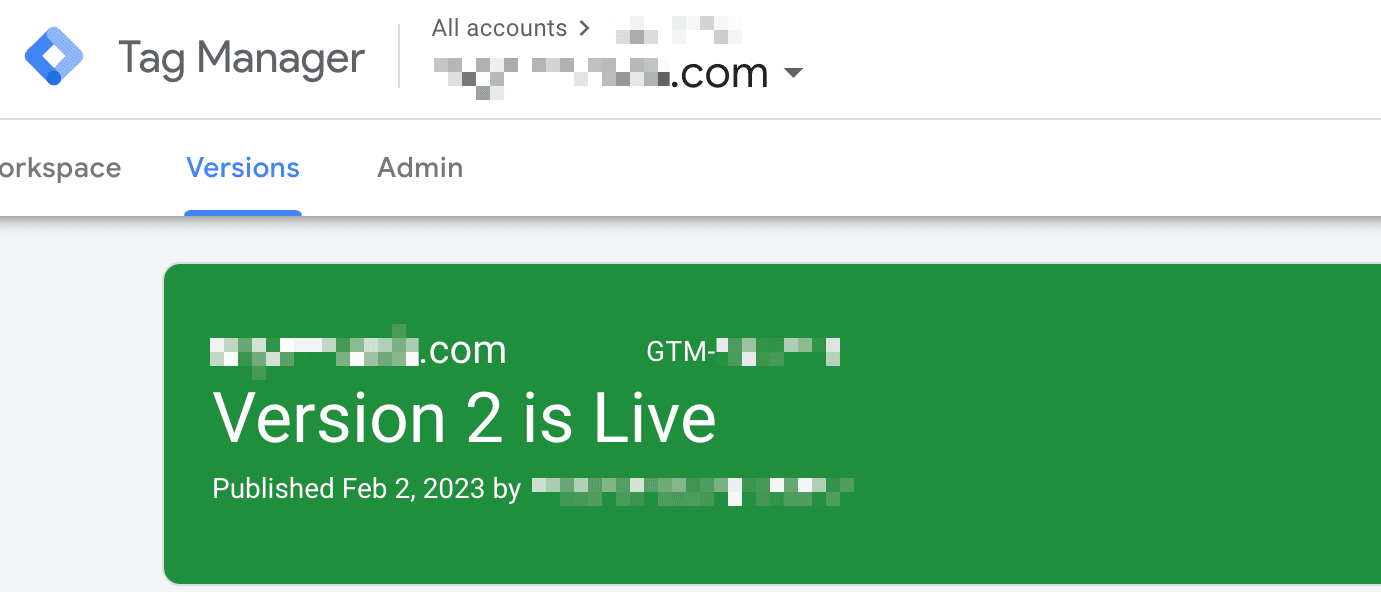
This message means that your changes are now live - GTM is ready to perform click-tracking in no time; that’s how you enable click variables in GTM.
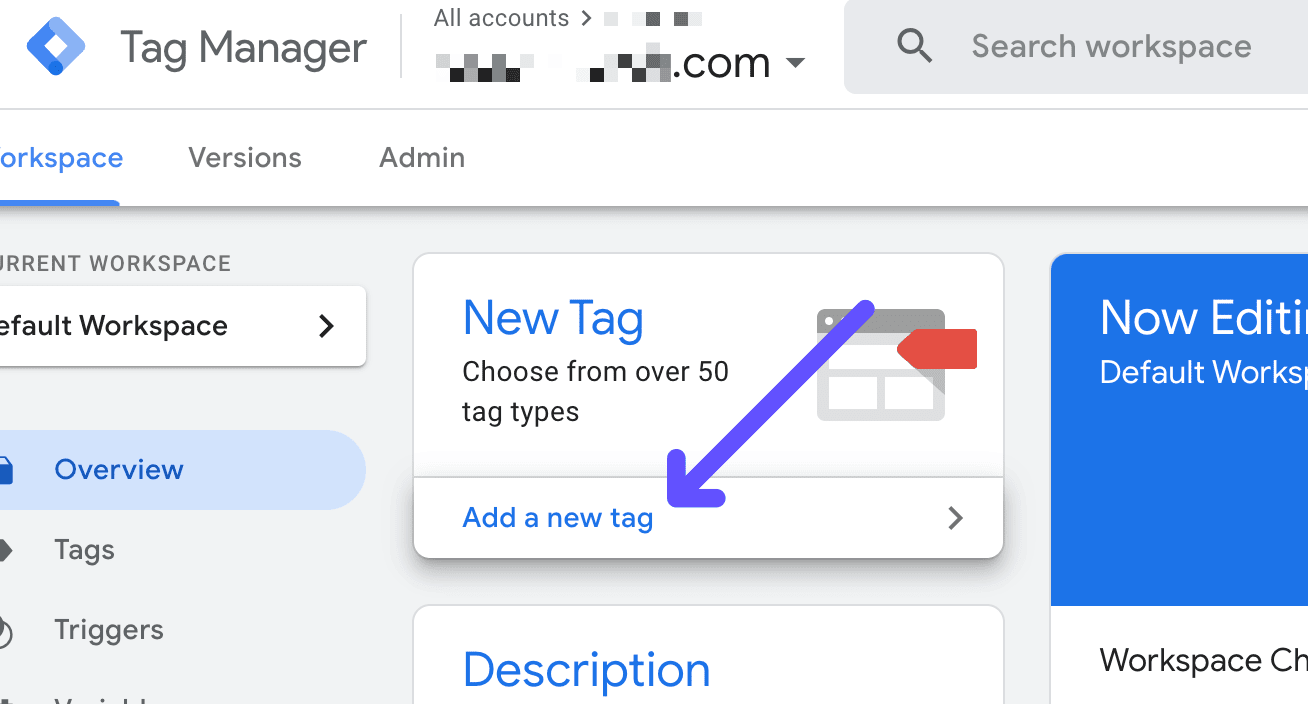
Step 4: Go to Overview and Select “Add New Tag”
Now, head back to the main GTM screen - we need to create a tag related to button tracking.
Click on the “Add a New Tag” button, and you will be redirected to a new tab where you will be able to configure the tag.
Step 5: Go to Tag Configuration and Create a New Event Tag
Here is where the magic happens - we need to create a tag that we can later “link” to the buttons on your website.
Start by naming the new tag - in this case, we named our tag “Button Click.” If you have multiple buttons, you can name the tag based on the exact name of the button.
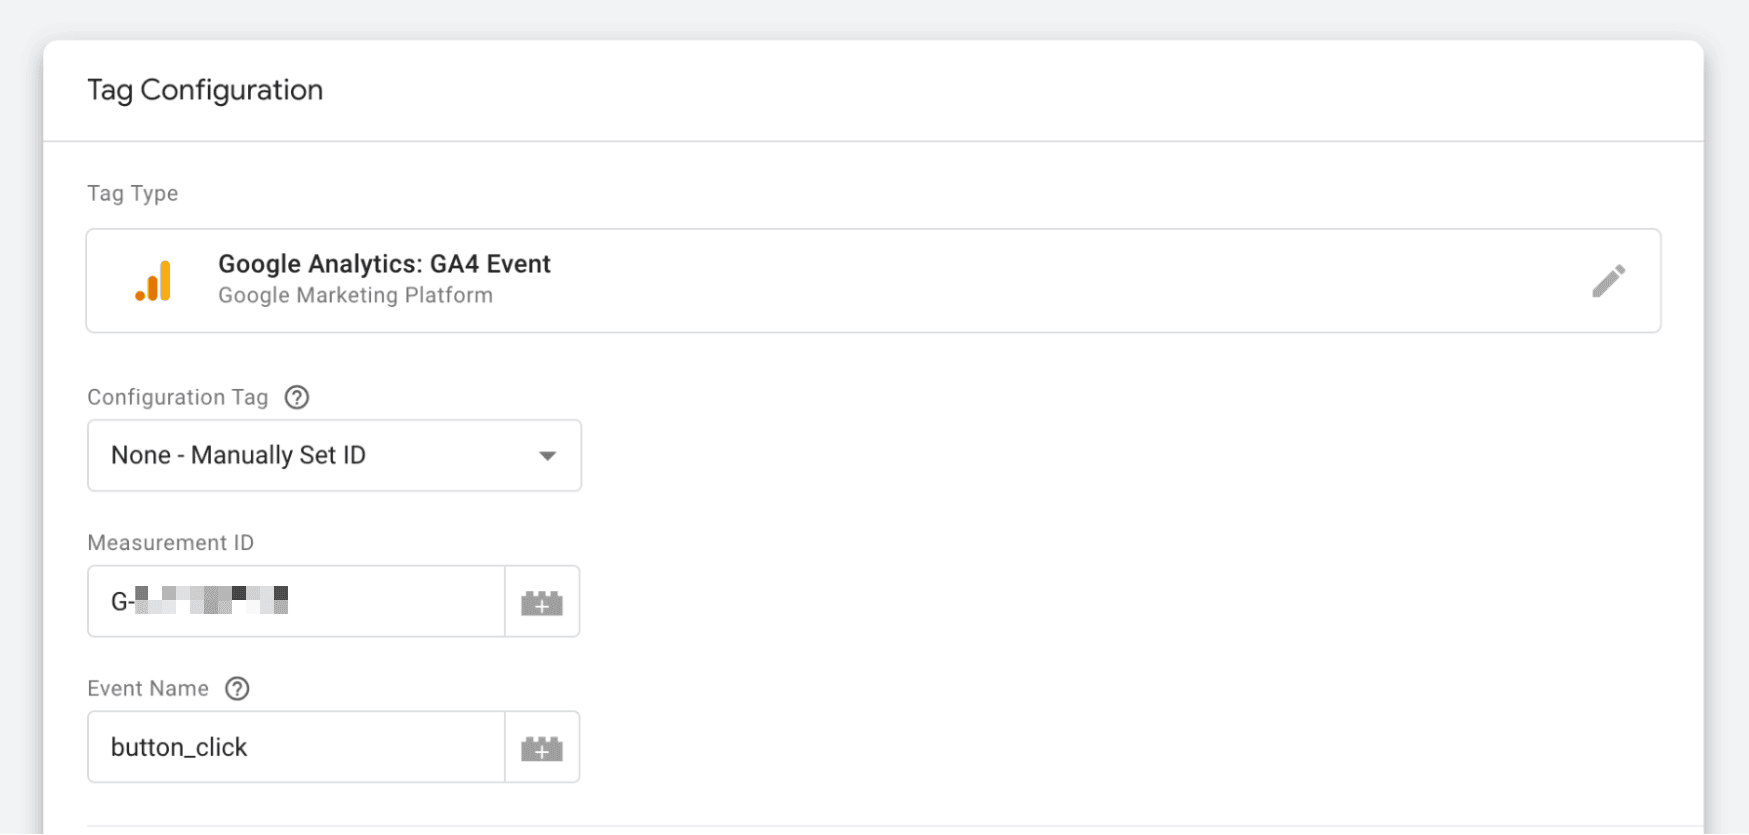
You will see three options here:
- Configuration tag: here, you must either select “Google Analytics: GA4 Event” or “Manually Set ID,” in case your Google Tag is still not ready. Both options will work.
- Measurement ID: if your GA4 Tag is not yet implemented, you will be asked to paste your Measurement ID here, which you can find in your Google Analytics account.
- Event name: remember that event names cannot contain spaces. In this case, we named our event “button_click.”
Complete the required parameters on each Google Tag Manager container option, and move on to the next step.
Step 6: Configure a New Trigger for the Tag
You need to create a trigger that will, well, trigger the tag variable that will track clicks. Open the Trigger option to “Choose a Trigger,” and then click on the plus button at the top right corner of the screen.
This will lead you to the Trigger Configuration tab.
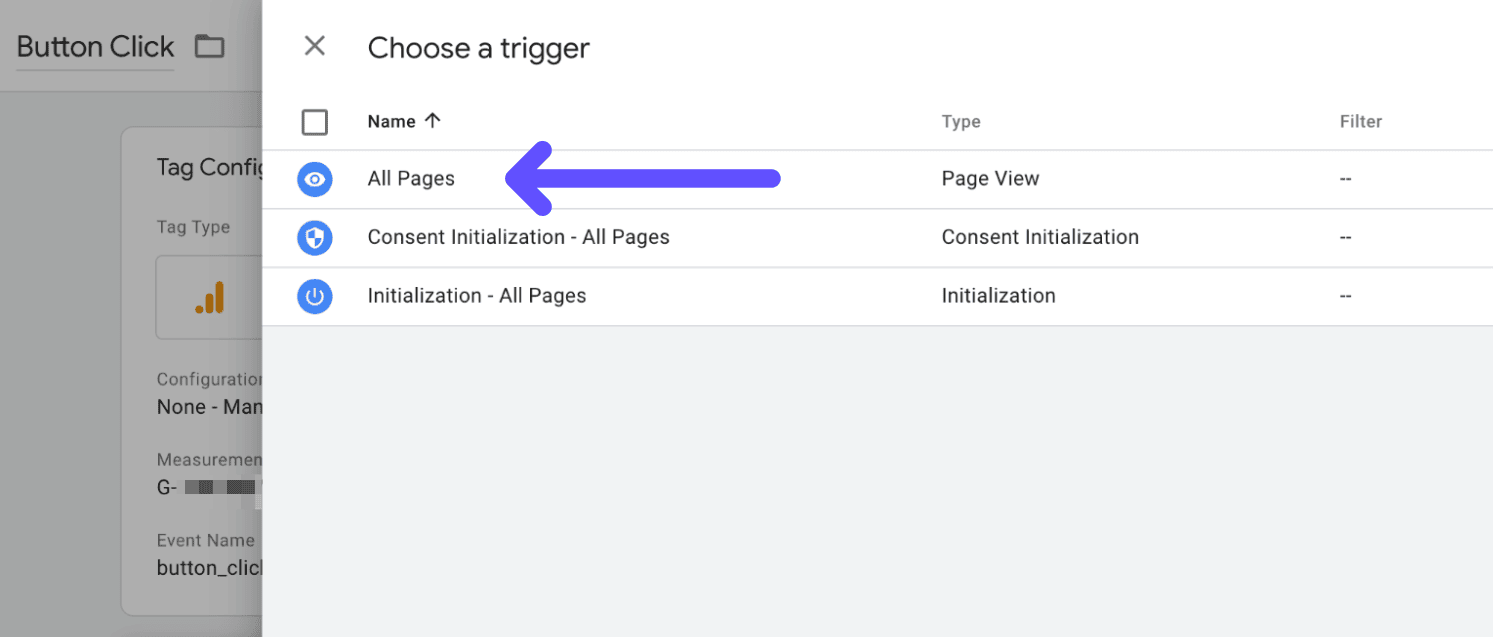
Select All Pages, and you will see a list of each trigger type here.
Scroll down through the list, and look for the Trigger option that says “Click - All Elements.”
Select it, and click “Save” so you can move forwards.
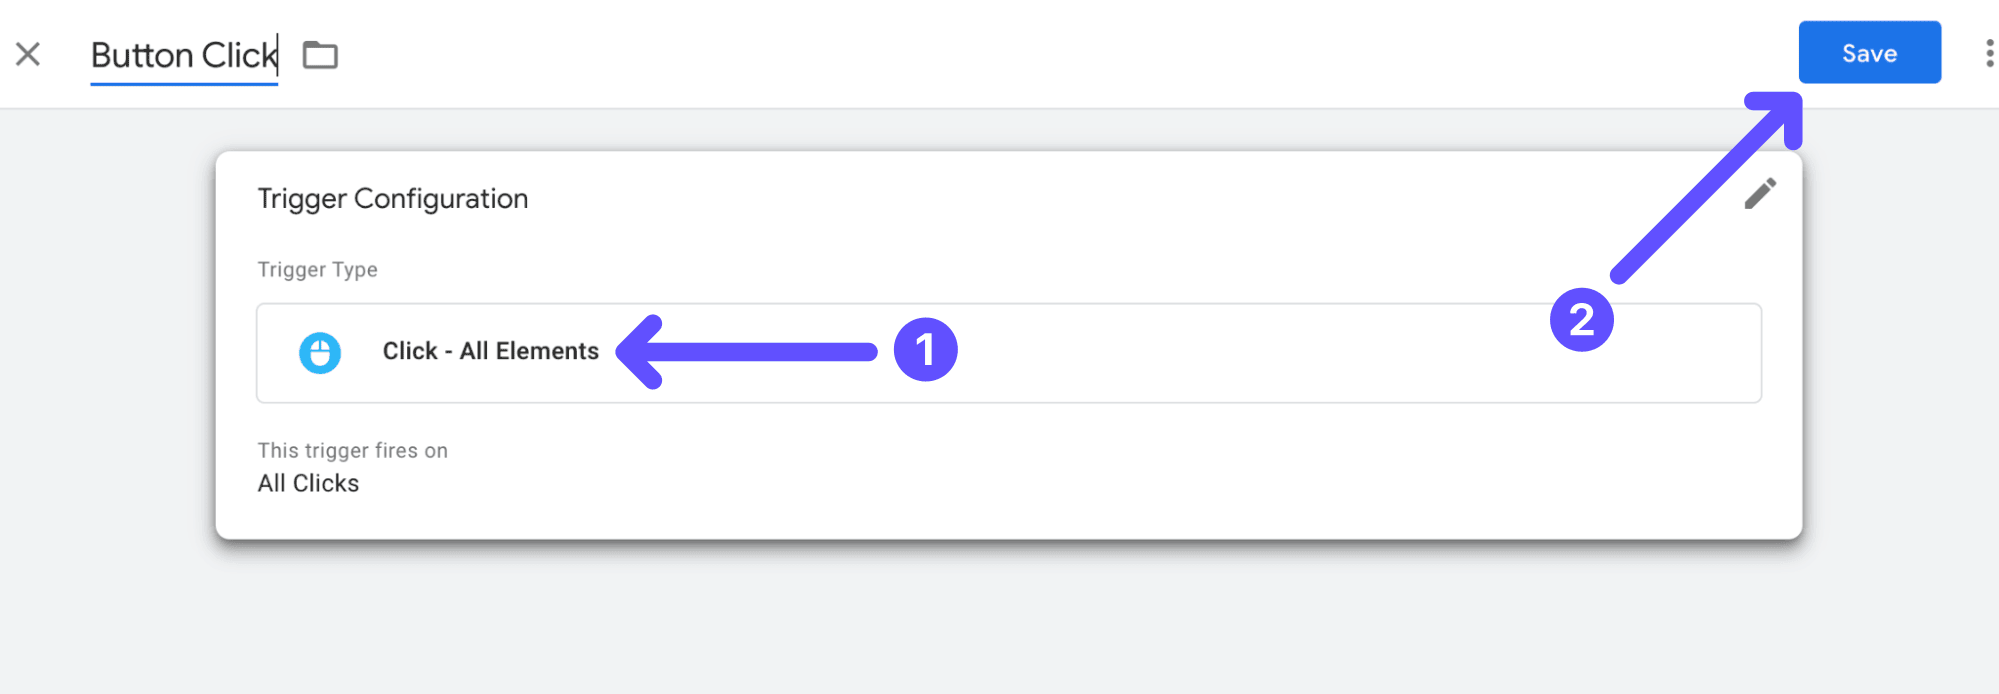
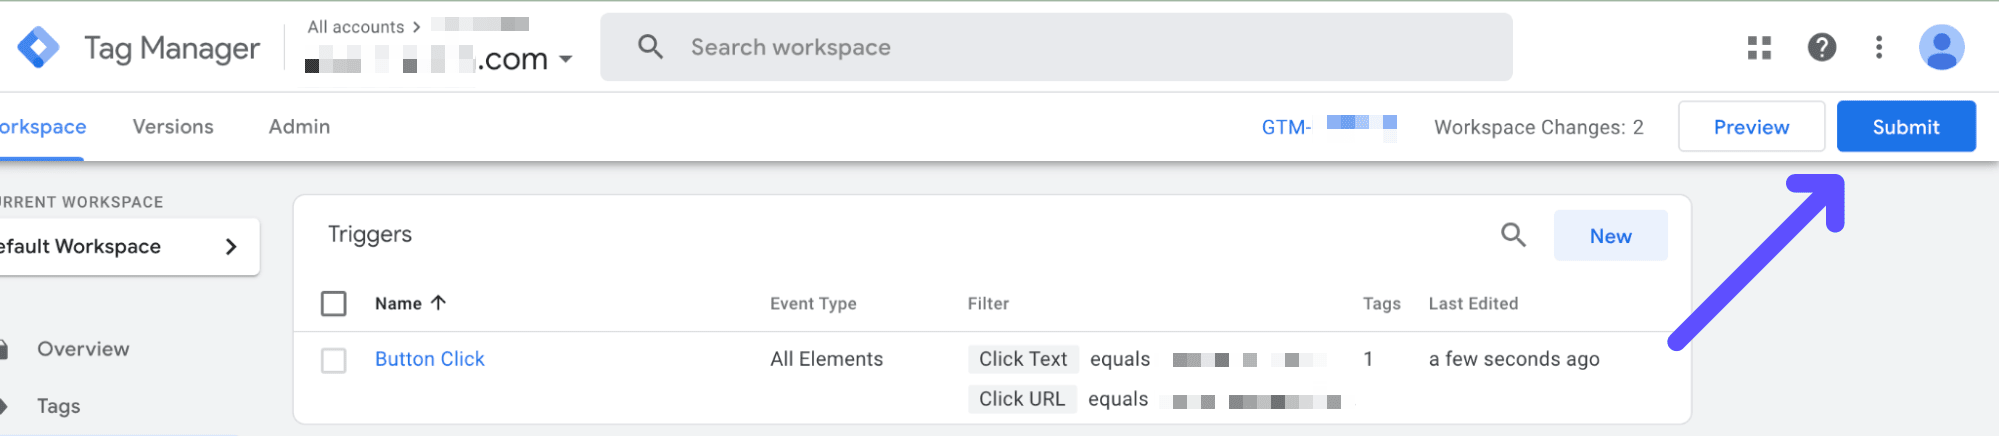
After creating both the Tag and the Trigger, the changes will be reflected on the main Workspace screen.
You need to make sure that it looks like the following screenshot:
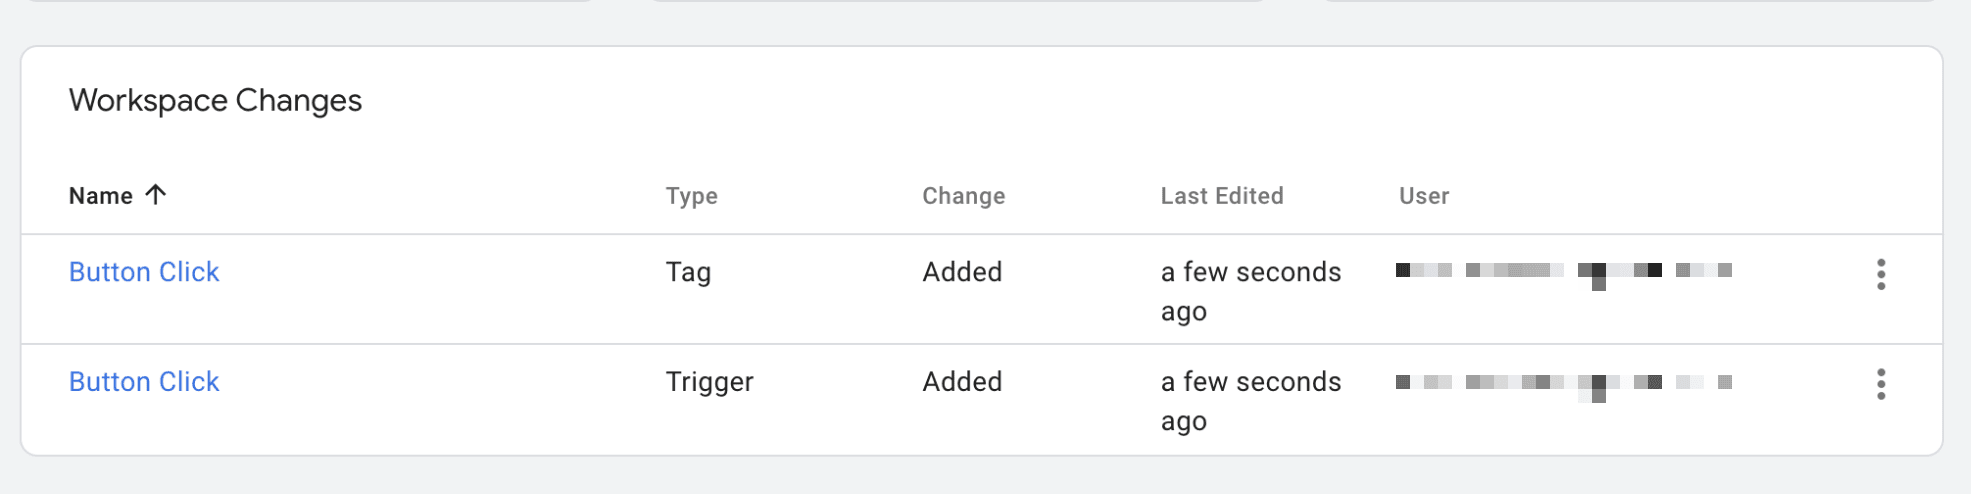
The variables in Google Tag Manager have been set up, and now it’s time to preview them.
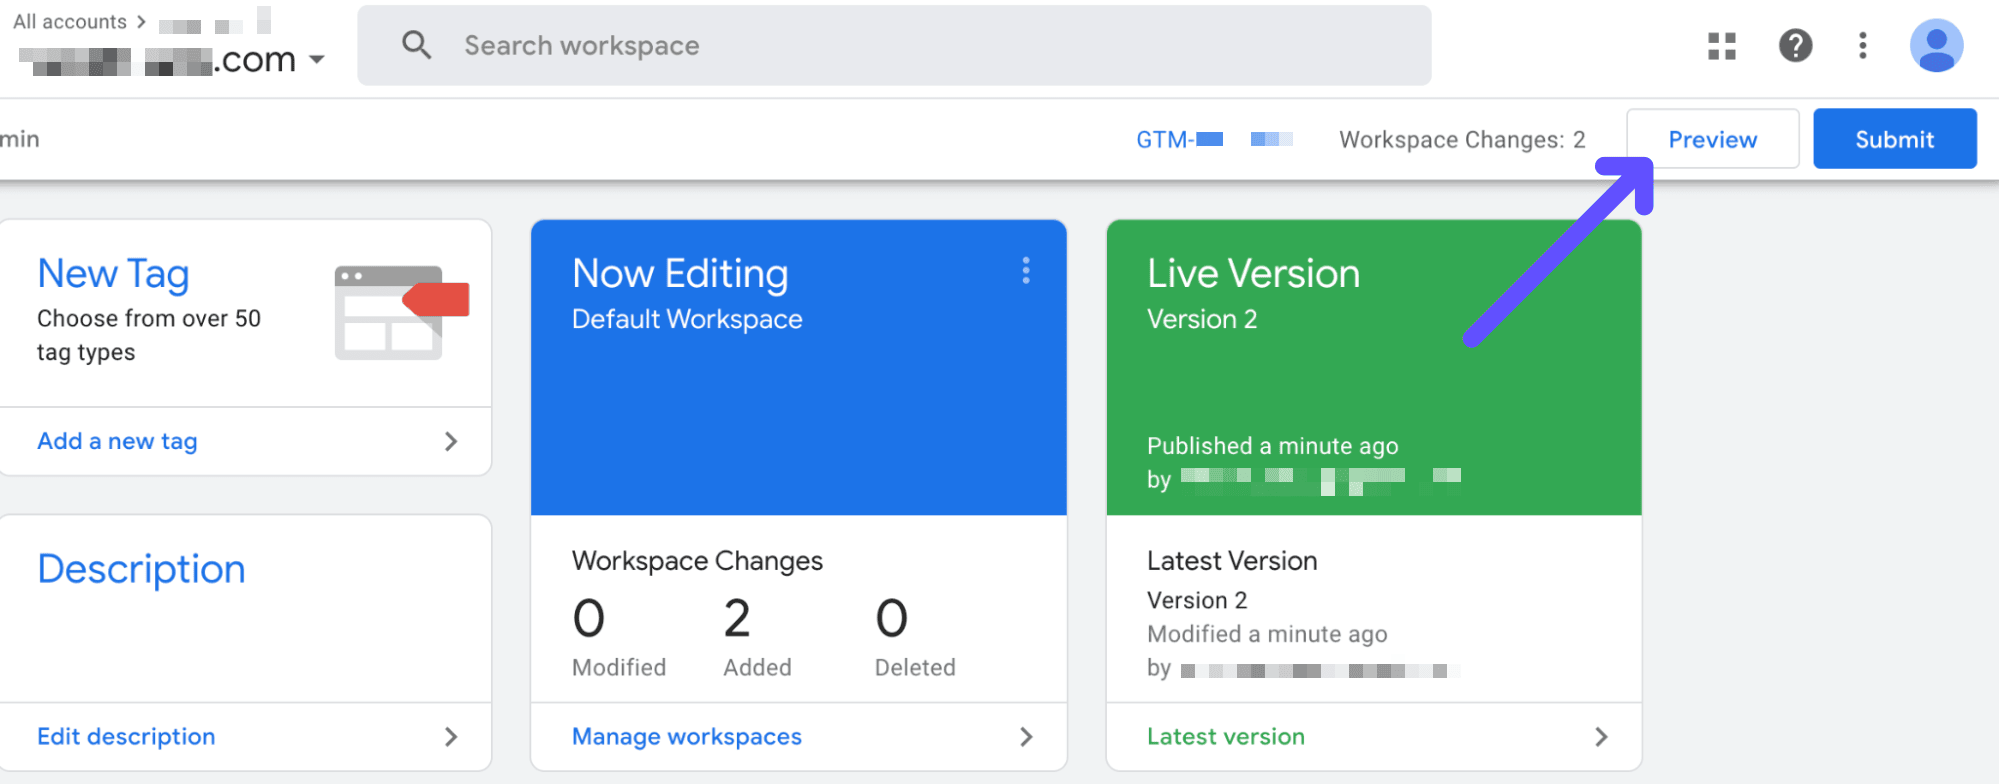
Step 7: Go to Google Tag Manager Preview
Go to the Preview Screen, which you can find in the main menu of the GTM Dashboard. It is located at the top right space of the screen, right next to the Submit button.
Click on “Preview,” and Preview Mode will initialize.
Step 8: Connect Tag Assistant to Your Site
Google Tag Assistant, also referred to as GTA, will need to connect to your site in order to test out your recent changes.
So, right after you open the Preview Tab, you will be asked to type in your site’s URL.
Make sure to include the exact URL where your buttons are. In our case, we will test the click event on a button that’s located on a website’s home page.
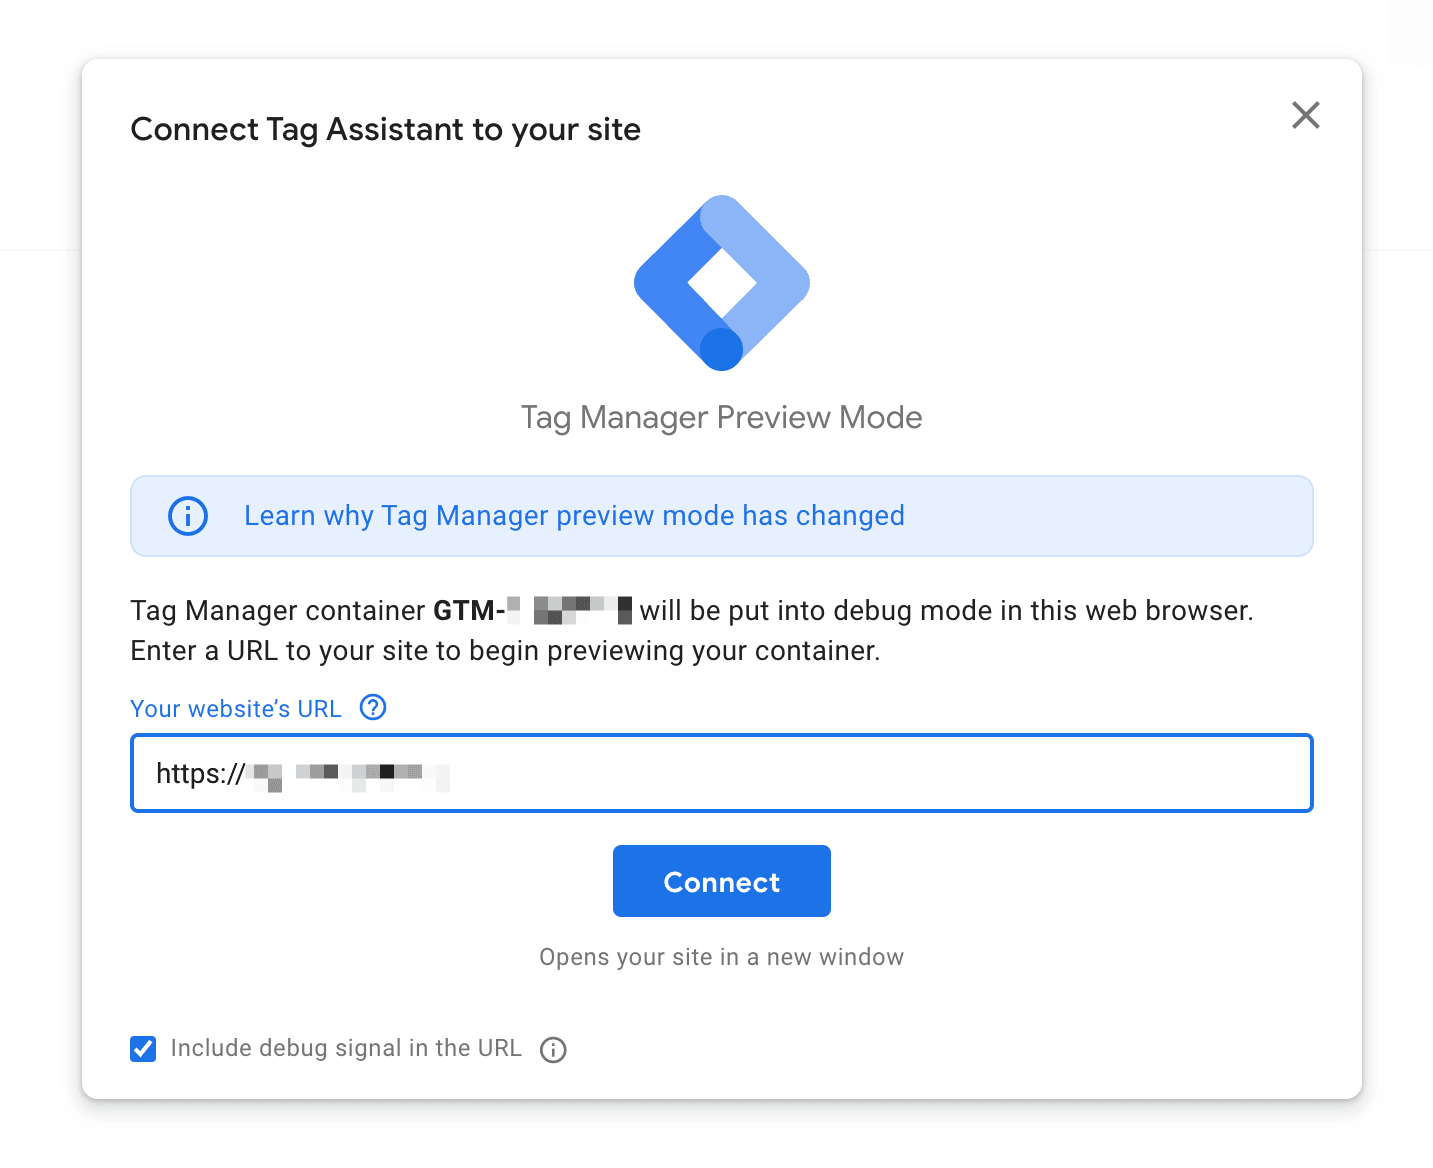
Click “Connect,” and the URL will open in another tab.
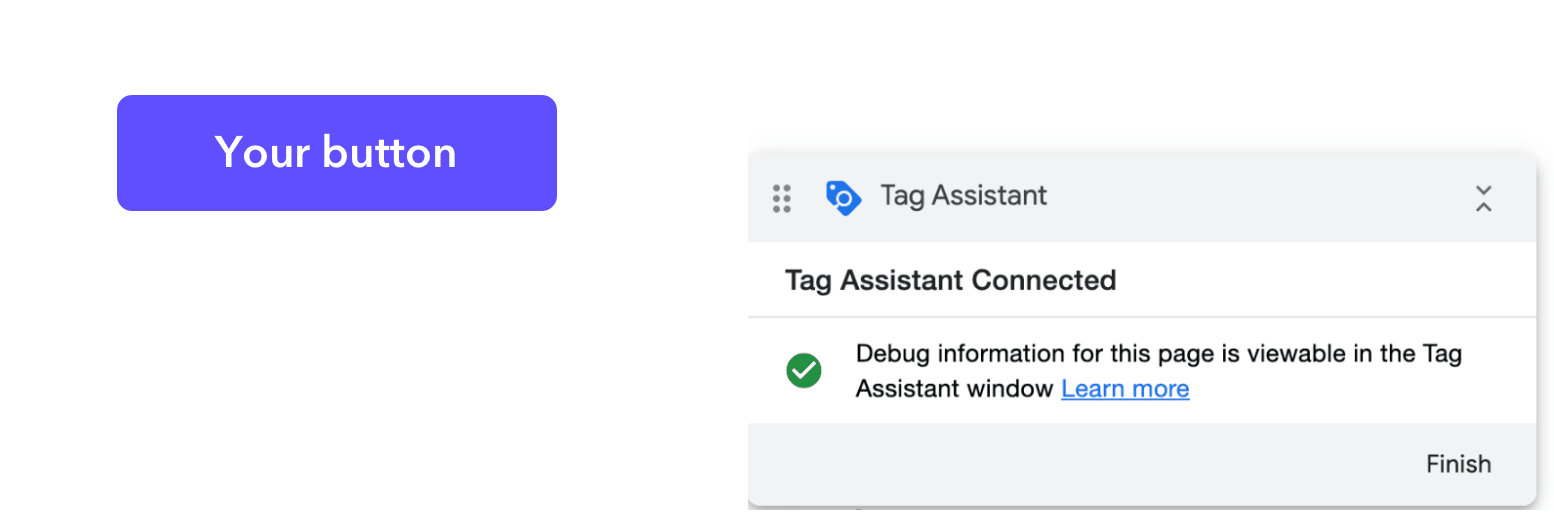
Step 9: Click the Button and Test it Out
In the tab that has just opened, you will see a message that says “Tag Assistant Connected” at the bottom right corner of your screen.
Scroll down your website until you find the button you want to track and click on it. Simply click the button, and proceed with the following step.
Step 10: Go Back to Google Tag Assistant Summary
After clicking the button, go back to the GTA Summary Tab, and the following message will appear:
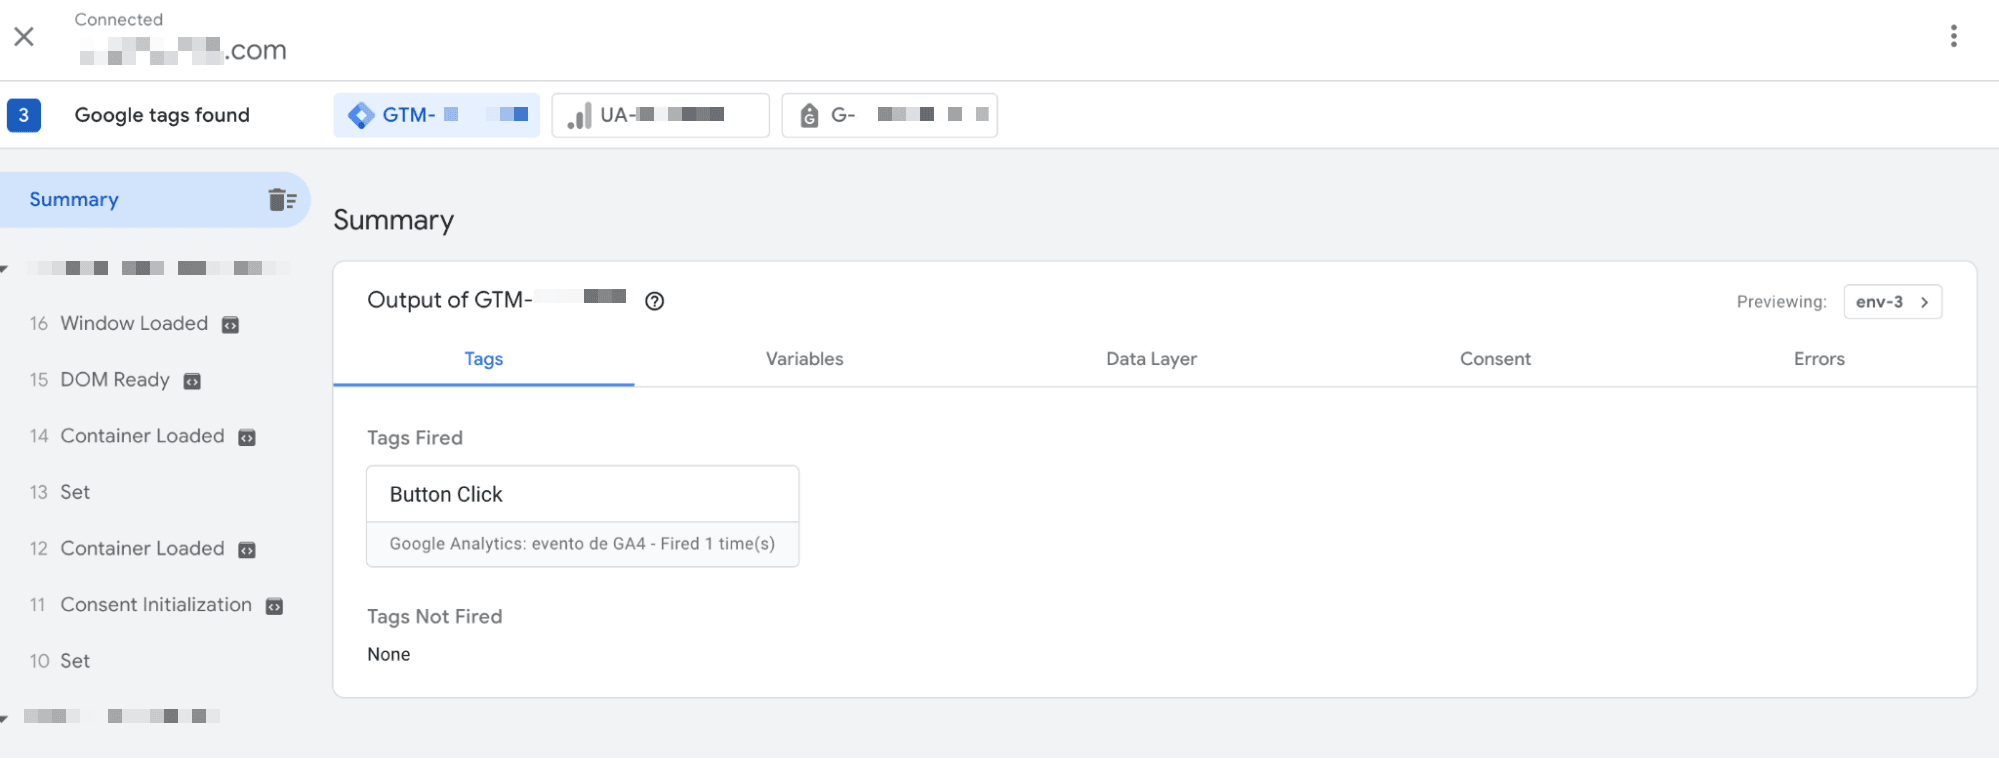
This means that the Button Click Event was successfully fired! GTA was able to identify that you clicked on something, but things do not end here.
Although our Tag name is Button Click, GTA only identified that you clicked on something in the target URL.
It does not recognize that you clicked exactly on the button.
But why does this happen, you might ask? Well, because we need to configure click elements with the exact variables of the button, which we can only see by triggering this first-stage event. Let’s move on.
Step 11: Check Out the Exact Button Variables
In the left-handed side menu of the GTA Preview Screen, look for the Click option and select it.
The following screen will open. Next, go to the Variables tab.
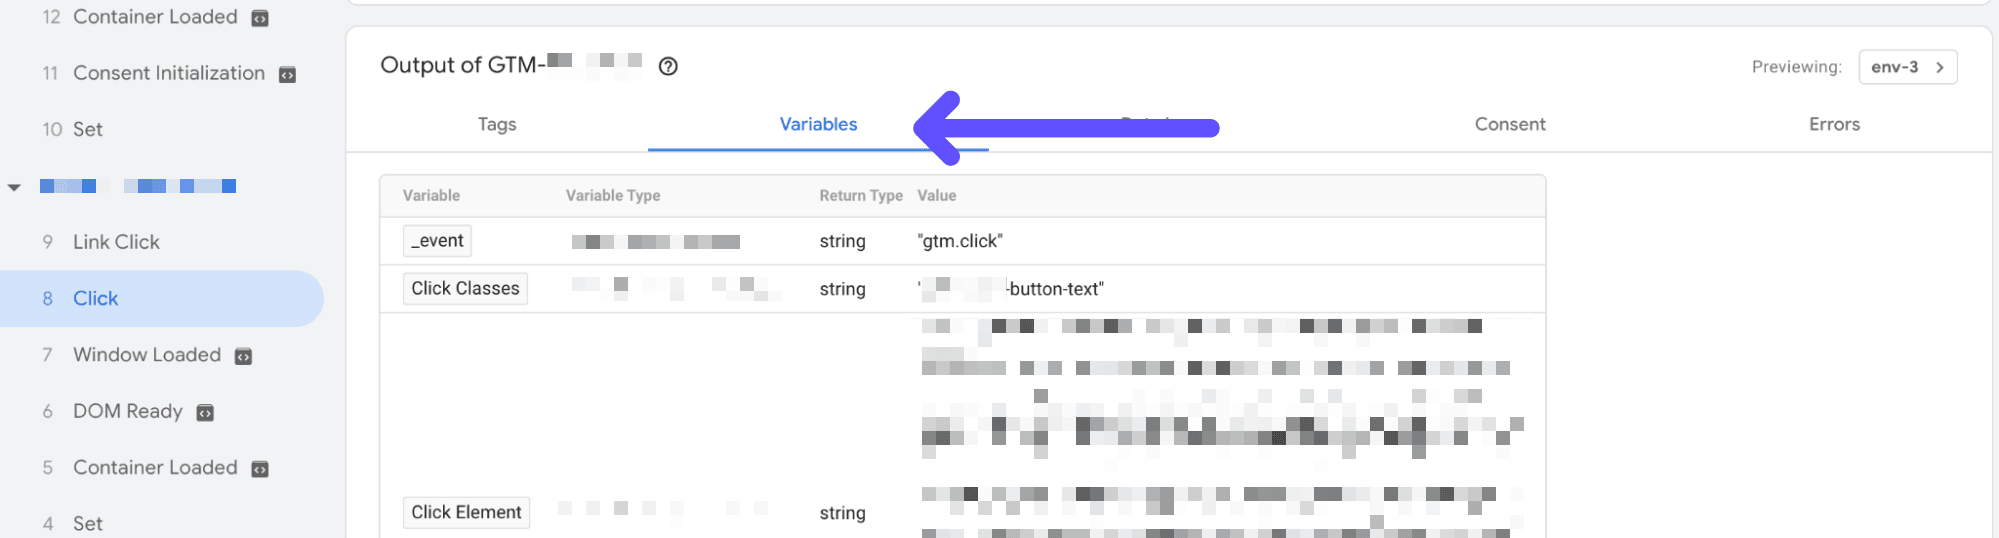
You need to find two important parameters in this Variables screen: Click Text, and Click URL.
Click Text refers to the exact text on the button, and Click URL refers to the exact link leading after you click the button.
Other variables, such as Click ID and Click Element, also have an influence on tags, but since we want to track Button Clicks only, locate the aforementioned variables and keep the tab open before you move on to the next step.

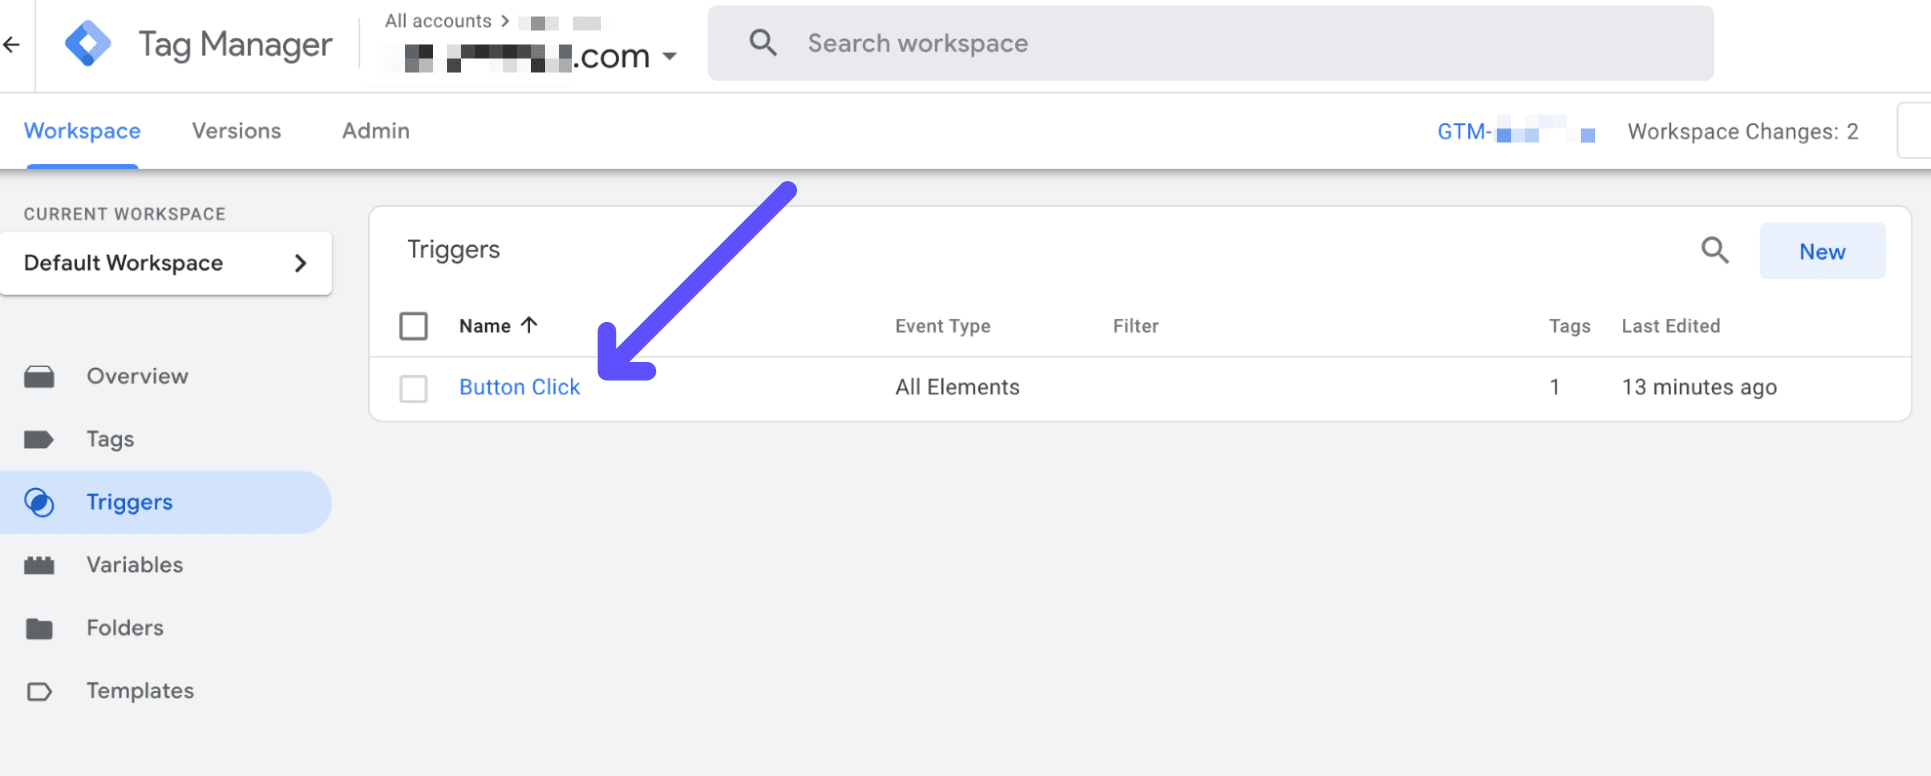
Step 12: Go Back to the Trigger Section on Google Tag Manager
We need to go back to Trigger Configuration in GTM. Locate the trigger that you want to modify (in our case is called Button Click) and click on it.
After clicking on the trigger, go to Trigger Configuration and change it from “All Clicks” to “Some Clicks.”
The screen will look like this:

Step 13: Set Up New Specific Trigger Variables
We are going to use both Click URL and Text variables, so the trigger is only fired when the exact button conditions are met.
Under “Fire This Trigger when an Event occurs and these conditions are true,” do the following:
- In the first one, set the options like this: Click Text - Equals - Exact Click Text Variable of your button.
- Press the + button, and in the second one, set the options this way: Click URL - Equals - Exact Click URL Variable of your button.
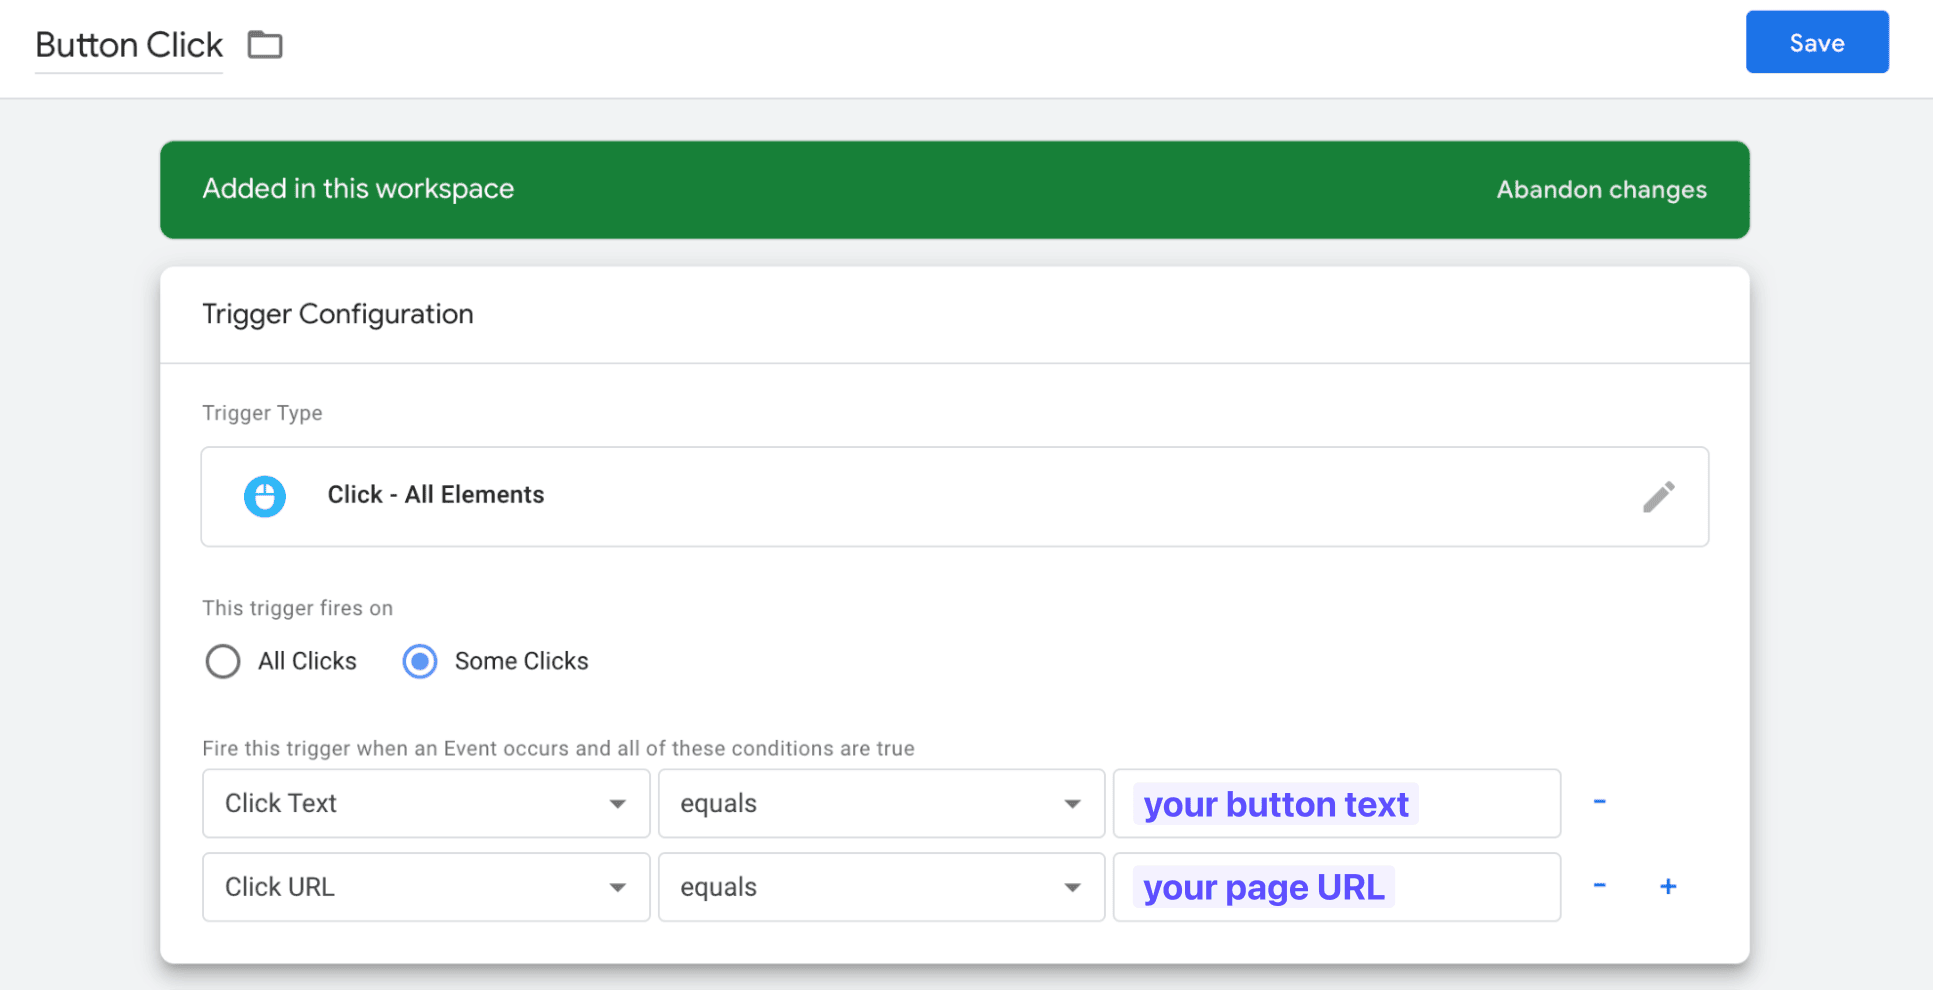
After doing this, click the Save button, and you will go back to the Tag Manager menu.
Don’t forget to click on Submit - otherwise, the changes will not be reflected on the overall Tag Configuration.
Step 14: Confirm that the Button is Firing
Now, your button click tracking tag should be set and ready to be fired and recorded, but we need to check that things are correct.
There are two ways to confirm that your button is firing, and they are the following.
Check Via Google Analytics 4 DebugView
GA4 has a Debugging Feature that shows all your current events at the exact moment they take place.
So, go to Google Analytics settings, and find the DebugView option. Then, go to your site, and click the button.
The DebugView will inform you that the button-clicking event has been triggered, which means that the process worked.
Check Via Google Tag Manager Assistant Preview
Another great option to see if the button is firing is going to the GTA Preview Mode again.
Open the Preview Mode as mentioned above, go to the target URL where the button is with GTA enabled, and click on the button.
Then, go back to the Google Tag Assistant Summary, and see if the button tracking event fired.
Summary: Setting Up Button Tracking in GA4
Using Google Tag Manager is the easiest way to set up button tracking features in GA4.
The ability to set up tags that are triggered by GA4 events provides us with new ways to understand all the things that happen within our websites.
Luckily, even with GA4’s messy interface, you start tracking button clicks on your site by following all the steps that we have gathered for you in this easy-to-follow guide.

BIO
Paul Jarvis, author + designer